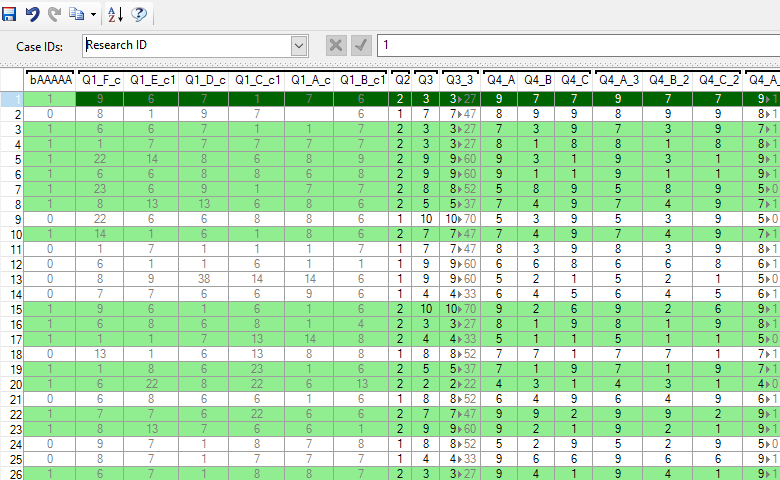
The purpose of the Data tab is to provide a view of the raw data being analyzed in Q. Each row in the Data tab represents a single respondent (or case). Each column represents a variable in the data set. You can make various changes in the Data tab, such as manually changing data or deleting individual cases. However, it is important to remember that, in Q, you are never modifying the underlying data being used for the analysis. These types of changes are actually being saved into your Q Project file (.Q) rather than back to your underlying data file. In this post, I provide various tips for working in the Data tab. This includes manually modifying data entries, filtering the data, and deleting and restoring records.
Setting the unique identifier
Before you can make any changes in your data, you need to first select a unique identifier for each respondent. Since these changes are not being applied to the underlying data, this will allow Q to keep track of any changes that have been made. These edits can then be re-applied to data in the event your underlying raw data file changes or is updated. To do this, go to the Data tab and then select a variable from the Case IDs drop-down list below the toolbar.
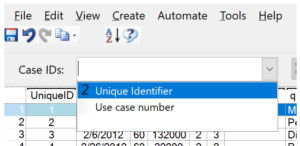
There are two different options in the example on the left:
Unique identifier – Select a unique variable from your data. Note: Q will only show variables which are unique (contain no duplicate values). If you do not have a unique identifier, you can use the next option.
Use case number – This option will use the position of the respondent in the file. Note: this is NOT recommended if you intend to update your project with new data. Since the order of the respondents in the new data file may be different from the original, you should only use this option if you are certain that any new cases in your data will always be added to the end of the file, or if you will not be updating the data set.
Manually changing data
Once the Case ID has been set, you can click on any cell and enter a new value. The new value will be displayed in a red font. When you hover over the new value, a tool tip showing the original value and the value label will appear. You can also change the data by clicking on a cell and changing the value in the formula bar above the data.

Note: this approach should not be used to re-code an entire column of data and is only recommended when correcting errors in the data. Recoding is best done through the Value Attributes.
Filtering data
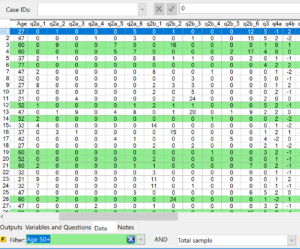
While filtering is commonly used on tables and charts in Q, you can also filter data on the Data tab. This provides a way to quickly identify respondents of interest, which can be helpful when you need to check the data for respondents in a particular group.
To apply a filter to the data, simply select any of the available variables from the Filter drop-down at the bottom of the screen (the same way you would apply a filter to a table). This will highlight the rows that match the selected filter. In the example below, we have created a filter for any respondent aged 50 or more and applied that filter to the Data tab. Note: all records which meet the filter criteria are highlighted in green.
To learn more about creating filters in Q, check out the Filters page on the Q Wiki.
Deleting data
To delete rows from the Data tab, the Case ID must first be set as described above. You can then right-click on a row and select Delete Row. If you have to delete a large amount of data, first apply a filter as described above to identify the rows to be deleted. With the rows highlighted, right-click on a row and then select Delete Rows Matching Filter (Green). This will delete all of the rows at once. The deleted rows are essentially hidden and can be restored to the project, if needed.
If you need to permanently delete cases from the underlying raw data file (useful if you need to provide a cleaned data file to someone else), see How to save a modified copy of an SPSS data file.
Restoring deleted rows
To restore any rows you have deleted, right-click on the row header and then select Revert Deleted Rows. You can select individual Case ID’s or you can restore all deleted rows at once by checking the Check/uncheck all checkbox at the bottom of the Revert Rows dialogue box.
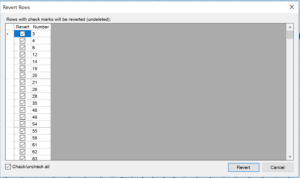
Click the Revert button to restore the deleted records. Note: you cannot restore records that have been permanently removed from the underlying data file using the method described in the previous section.